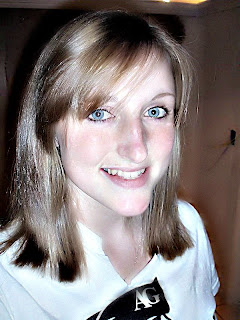
The Dave Hill Look
Hi everyone it's been quite awhile since I blogged as I've been quite busy and now is the only time that I'm free so here goes....
I recently stumbled on what they call the "Dave Hill Look" and I've gotten interested in it that I've decided to try and attempt to create that look. I researched on how it is done and hoping I would come close to the "look" Here is my first attempt at it, feel free to comment and critique on it.


The picture on the left is the original one and the one on the right is the supposedly dave hill look. I'm not sure if i got it or even close to it, I did follow the tutorial I guess it takes lots of practice for a novice like me hehehe. Here's the steps in achieving the "Dave Hill Look" which i found in the DIYPhotography.net website:
- The first thing is to duplicate the image layer (CTRL + J) and run a High Pass filter on the duplicate layer. Then choose 4.0 as filter radius.
- The next step is to select "vivid light" as the layer blending mode. Now flatten the layers (CTRL + SHIFT + E).
- Again, duplicate the layer, and do a High Pass filter on the dup. This time select 6.9 as radius and color as blending mode.
- Now choose layer opacity 40% and flattened again.
- Now again - duplicate the layer. Now call on the Gaussian Blur (Filter-> Blur-> Gaussian Blur) filter and set it to 9.5. Still using the dup layer, call on the noise filter (Filter -> Noise -> Add Noise) and apply 3% noise.
- Now add a layer mask (Layer -> Add Layer Mask -> Hide All), and select the eyes using the lasso tool (L is the short cut for this). Now invert the selection (Shift + Control + I).
- Now take the brush tool (B) set the opacity to 30% and paint over the entire image. TADA! Eyes are a bit sharper then the rest of the image. Flatten again.
- The final step is to apply some unsharp mask filter (Filter -> Sharpen -> Unsharp Mask). Use the following values: Amount 100%, Radius 30.0 Pixels, Threshold 0.
Labels: Photography


0 Comments:
Post a Comment
Subscribe to Post Comments [Atom]
<< Home